
In my first attempt at real tractor repair, the target is Beffie – my wife’s 1951 Ford 8N tractor which is painted pink in honor of her Aunt Beth who passed from breast cancer. We miss you Beth!
We bought the tractor with the original Power Take Off (PTO) shaft which required an adapter to connect to modern implements. Not a big deal but not ideal. At the advice and nudging of her uncles, they purchased a replacement and I was off to change all by my lonesome, the best way for me to learn.
First Lesson Learned
Tractors need oils to lubricate, cool, and in some cases to pressure for hydraulics. In my rush to remove and replace the old PTO shaft, I didn’t think, or research, and magically 5 gallons of transmission fluid dumped all over the floor.


Not a great start but with tractors I learning patience. Research, ask questions, and listen to your gut. When you are pissed. Walk away and then try again later.
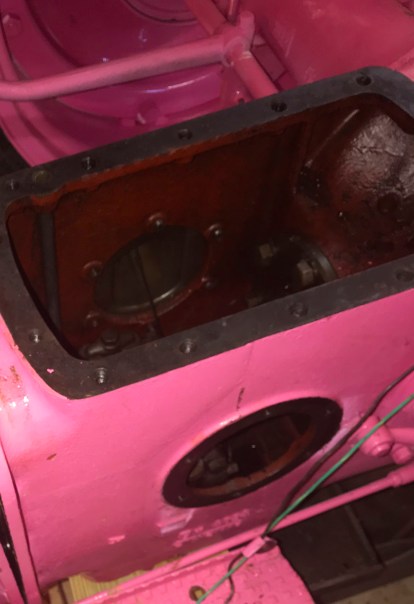
The Problem
So for this tractor model, once the fluid is drained and 4 bolts removed, the shaft is supposed to just slide out with ease. That did not happen. Many attempts with crowbars and other levers yielded no movement. After more research, conversations with my wife’s family, and some back-and-forth with an “old-timer” who knows much about tractors, conclusion was that the shaft was warped – @#$%!!!

Slightly warped shaft that caused many many hours of sweat and frustration
The Solution
The follow is a breakdown on how I went about successfully removing the warped shaft
Step 1: Drain transmission fluid and remove bolts back part of shaft.
There are three plugs underneath to enable draining with about 4.5 gallons of fluid. 4 bolts on the back are just the beginning of 10s of bolts.

Four bolt removal, EASY!
Step 2: Remove PTO engagement cover.

Step 3: Remove seat and hydraulic lift cover/pump (which is under seat).
Yet again, more bolts to remove. Keep in mind you will need another person to assist in lifting. This thing is stupid crazy heavy.
Step 4: Saw through the original shaft through the PTO engagement cover with sawzall.
The shaft isn’t hardened steel however it took me around 15 mins of constant sawing. Keep in mind all metal fragments will need to be cleaned out before assembling and filling with fluid. I used a rag to minimize the spread of this dust.

Had to saw through PTO lever cover. Only way to reach the shaft.

Bottom left shows resulting shaft after cut.
Step 5: Separate the tractor at the point between the engine and pump compartments.
I didn’t realize this was going to be necessary to remove the hydraulic pump. I was super nervous but learned that with a couple of jacks, jack stands, and yet again with patience its possible. Can be very dangerous. It did take me a while but I made it happen. Very rewarding and amazing to see how this beast works.


Step 6: Remove hydraulic pump and disassemble.
Finally remove the pump. Certainly a messy effort but just a 9 or so bolts, and its out after some wiggling. Now all of the problem is within you hands.
As you disassemble you most likely will have springs and other small pieces to come out. Make sure to keep track and organized. Again, fascinating that this almost 70 old system still functions.

.
Step 7: Remove bent shaft piece.
After disassembled, I tried and tried to carefully remove the shaft. No luck. Eventually had to get a metal punch to hammer it through. Success however broke one of the pistons. No matter, easy to find a replacement for about $16 online.


Finally removed and now an addition to my desk in my office.
Step 8: Clean and put it all back together
Cleaning, getting new gaskets (or making them), and bolting it all back together was much less difficult than I expected. Assembling the pump and getting the compartment halves back together was the most challenging. Very awesome to learn by doing.
